
Replacing the Adjustable Pillow Hose just got easier with our new specialty fit hose. It works just as well, and installs easier than the factory original.


Step 1: Remove the pillow carrier.
To start, raise the pillow carrier (Figure 1-A) until the plastic pins on each side can slide forward out of the rails (Figure 1-B). Tip the top-right corner up and out so the bottom-right pin can slide out of the rail (Figure 1-C). The complete pillow carrier assembly should now be out of the rails.


Step 2: Cut and remove the old hose from the pillow carrier.
Using hose cutters or a utility knife, cut the hose in two (Figure 2-A). This will make it easier to work on both halves of the assembly. Using a large pair of channel locks, thread the nut up the coil a few turns, to the end of the hose. (Figure 2-B). With a pair of diagonal cutters, snip 2-3 coils from the bottom of the hose where it attaches to the pillow carrier. Remove the old hose. (We make it sound easier than it is, so be patient). Remove the hose nut on the back of the pillow carrier (Figure 2-C).
Step 3: Install the new hose onto the pillow carrier.
Trim the new hose to the same length as the original, but allow a little extra length for shrinkage that may have occurred over time. Take one end of the new hose and slide it onto the exposed pillow carrier barb. Attach a Snapper Clamp about ½” from the bottom of the hose. Using a large pair of channel locks tighten until it holds the hose securely in place, (Figure 3-A). Figure 3-B shows the clamp attached to the hose.


Step 4: Remove the old hose from the spa shell.
Using a large pair of channel locks, thread the nut up the coil a few turns, to the end of the hose. Again using your diagonal cutters or a utility knife, snip 2-3 coils at the bottom of the old hose where it is attached to the spa shell. As before, remove the old hose and nut.

Step 5: Install the new hose onto the spa shell.
Slide the new hose onto the barb. Attach a Snapper Clamp about ½” from the bottom of the hose, using a large pair of channel locks to tighten, until it holds the hose securely in place.

Step 6: Reattach the pillow carrier.
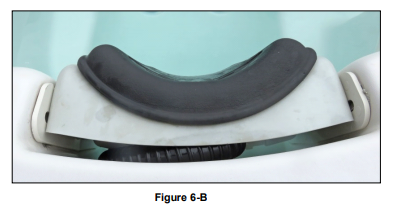
Tip the top-right corner of the pillow carrier up so the bottom-left pin can be placed into the rail (Figure 6-A). Place the bottom-right pin into its rail. Lift the carrier so the top pins can be slid into the rail openings. The pillow carrier should now be back in place and can be adjusted to your desired height (Figure 6-B).

Step 7: Check for leaks.
Activate the pump(s) to test for a loose connection. No leaks? Good work – you’re done!
Please call if you have any questions
(866) 418-1840 toll free in the US