
When one or both of the pillow rails separate from the spa shell, the carrier assembly will no longer slide up or down and adjust to your desired height. The original designs used either nylon or metal screws, or an adhesive foam gasket to mount the rails. New spas use a thin, “Very High Bond” (VHB), self-adhesive gasket for mounting these rails. The following procedure appears long, but we have broken it down into small steps. Be patient, take your time, and you’ll be pleased with the results. You can call us anytime you have a question or need additional assistance. Toll Free (866) 418-1840.
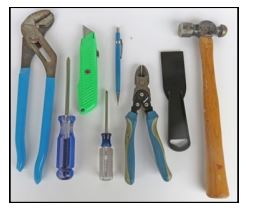
Tools Required for the job:
Channel Locks, medium Phillip’s head screw driver, utility knife, small Phillip’s head screw driver, pencil, diagonal cutters, putty knife or spatula, and small hammer.
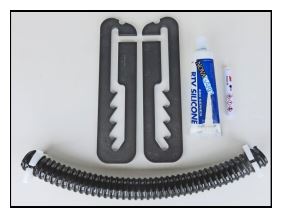
Parts required for the job:
Pillow rails & gaskets (applied on the back side of the rails in this picture), silicone, primer, and hose with clamps.
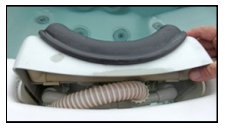
Fig 1a
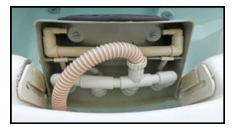
Fig 1b
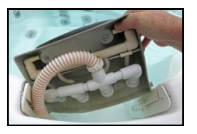
Fig 1c
Step 1: Remove the pillow carrier
To start, raise the pillow carrier (Fig 1a) until the plastic pins on each side can slide forward and out of the rails (Fig 1b). Tip the top-right corner up and out so the bottom-right pin slides out of the rail(Fig 1c).
The complete pillow carrier assembly should now be out of the rails.
Step 2: Cut and remove the old hose from the pillow carrier
Using hose cutters or a utility knife, cut the hose in two (Figure 2-A). This will make it easier to work on both halves of the assembly. Using a large pair of channel locks, thread the nut up the coil a few turns, to the end of the hose. (Figure 2-B). With a pair of diagonal cutters, snip 2-3 coils from the bottom of the hose where it attaches to the pillow carrier. Remove the old hose. (We make it sound easier than it is, so be patient). Remove the hose nut on the back of the pillow carrier (Figure 2-C).
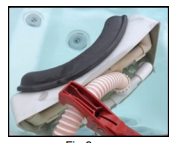
Fig 2a
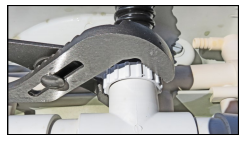
Fig 2b

Fig 2c
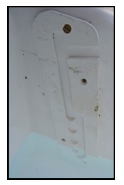
Step 3: Pillow Rail with Nylon Screws
When the pillow carrier assembly has been removed the rail looks like this if it is still attached to the spa shell. Lower the water level of the spa enough so you can work in a clean, dry area.
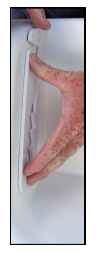
Step 4: Remove Rails
If the rails were originally installed with nylon screws, the heads can be removed,(by prying them off as pictured), using a small flathead screwdriver.
Rails with a foam gasket can also be removed as pictured. Note: Make sure to remove the entire foam gasket before proceeding. A plastic spatula may be helpful here.
Metal fasteners can be removed by simply unscrewing them.
Step 5: Tap Nylon Screw Body into Shell & Fill Hole with Silicone
If you popped off the nylon head, use a small Phillips head screwdriver and hammer to push the threaded body into the foam behind the shell. Go easy; it only needs to be pushed about 1/2 inch. Use a high-quality, clear silicone to fill hole. Remove excess silicone with a rag.
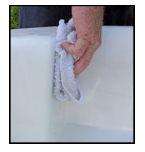
Step 6: Clean Spa Surface with Isopropyl Alcohol
Remove any dirt, grime or old adhesive residue. Thoroughly clean the affected surface using isopropyl alcohol.
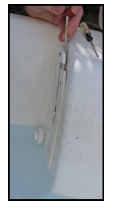
Step 7: Draw Outline of Old Pillow Placement
Hold the old rail in its original position using the screw holes as a guide. With a pencil, draw a silhouette of the rail. This will ensure the new rail lines up with the existing plumbing. For rails that originally used a foam gasket, the rail fits into a recessed spot making it easy to find the correct location. (Fig 7a)
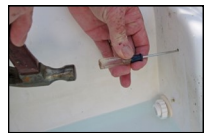
Use needle nose pliers to pinch the dot on the primer tube. (Fig 7b)
Use the primer to “paint” inside the lines of your profile. (Fig 7c)
Wait two minutes for the primer to cure before proceeding.
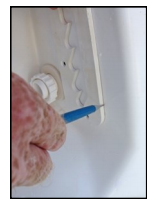
Fig 7a
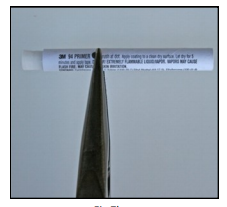
Fig 7b
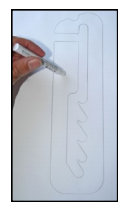
Fig 7c
Step 8: Remove Liner & Install Rail
After two minutes, the primer is ready to bond to the VHB gasket. Remove the paper liner from the new rail and lay the adhesive side inside the lines of its’ silhouette. The open slot should be placed on top and facing the “water” side of the spa. Hold firmly in place for two minutes
Note: The” VHB” gasket is quite tacky and will not allow you to move it after it has been pressed into place.
Step 9: Install the new hose onto the pillow carrier
Trim the new hose to the same length as the original, but allow a little extra length for shrinkage that may have occurred over time. Take one end of the new hose and slide it onto the exposed pillow carrier barb. Attach a Snapper Clamp about ½” from the bottom of the hose. Using a large pair of channel locks tighten until it holds the hose securely in place, (Figure 9a). Figure 9b Shows the clamp attached to the hose.

Fig 9a
Fig 9b
Step 10: Remove the old hose from the spa shell
Using a large pair of channel locks, thread the nut up the coil a few turns, to the end of the hose. Again using your diagonal cutters or a utility knife, snip 2-3 coils at the bottom of the old hose where it is attached to the spa shell. As before, remove the old hose and nut.
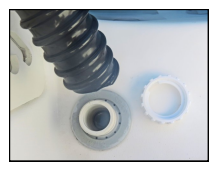
Fig 10a
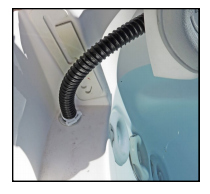
Fig 10b
Step 11: Install the new hose onto the spa shell.
Slide the new hose onto the barb. Attach a Snapper Clamp about ½” from the bottom of the hose, using a large pair of channel locks to tighten, until it holds the hose securely in place.
Step 12: Reattach the pillow carrier
Tip the top-right corner of the pillow carrier up so the bottom-left pin can be placed into the rail(Figure 12a). Place the bottom-right pin into its rail. Lift the carrier so the top pins can be slid into the rail openings. The pillow carrier should now be back in place and can be adjusted to your desired height (Figure 12b).
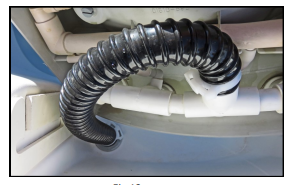
Fig 12a
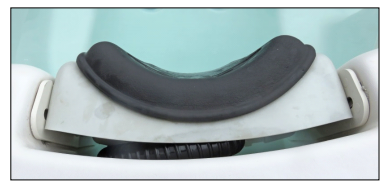
Fig 12b
Step 13: Check for leaks.
Activate the pump(s) to test for a loose connection. No leaks? Good work – you’re done!
Please call if you have any questions
(866) 418-1840 toll free in the US